 |
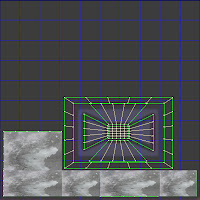
| This is a map of a house model in 3ds Max. |
In Chris's lesson today we were asked to make a basic texture in Photoshop and then add that texture to a ready made model in 3DS-Max. This was done by using a map of the 3d model as shown in the image to the left.
I then copied and pasted textures found on Google images into Photoshop and scaled them to fit within the model map. Each texture is supposed to resemble the materials often used in houses.
Once we had made our texture we saved the Photoshop image in JPEG format then went back onto 3DS-Max.
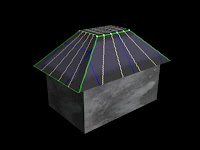 |
| Here is the textured model in 3DS-Max. |
|
In 3DS-Max we used the material editor tool to add the mapped out texture onto the house model. We did this by selecting Defuse tool choosing the Bitmap option then selecting the JPEG image we had made earlier. Then simply clicked the icon that looks like a Rubik cube to show the standard map in the view port. Then we just drag and drop the texture onto the model and then everything fits according to the map we created. This is a very basic and useful way of texturing models of course there is alot that be expanded on in this topic. We could add windows and many different textures to achieve more depth and realism with our 3D models.


No comments:
Post a Comment